Income (and Expense) Plans
Setting up Income Plans
Overview
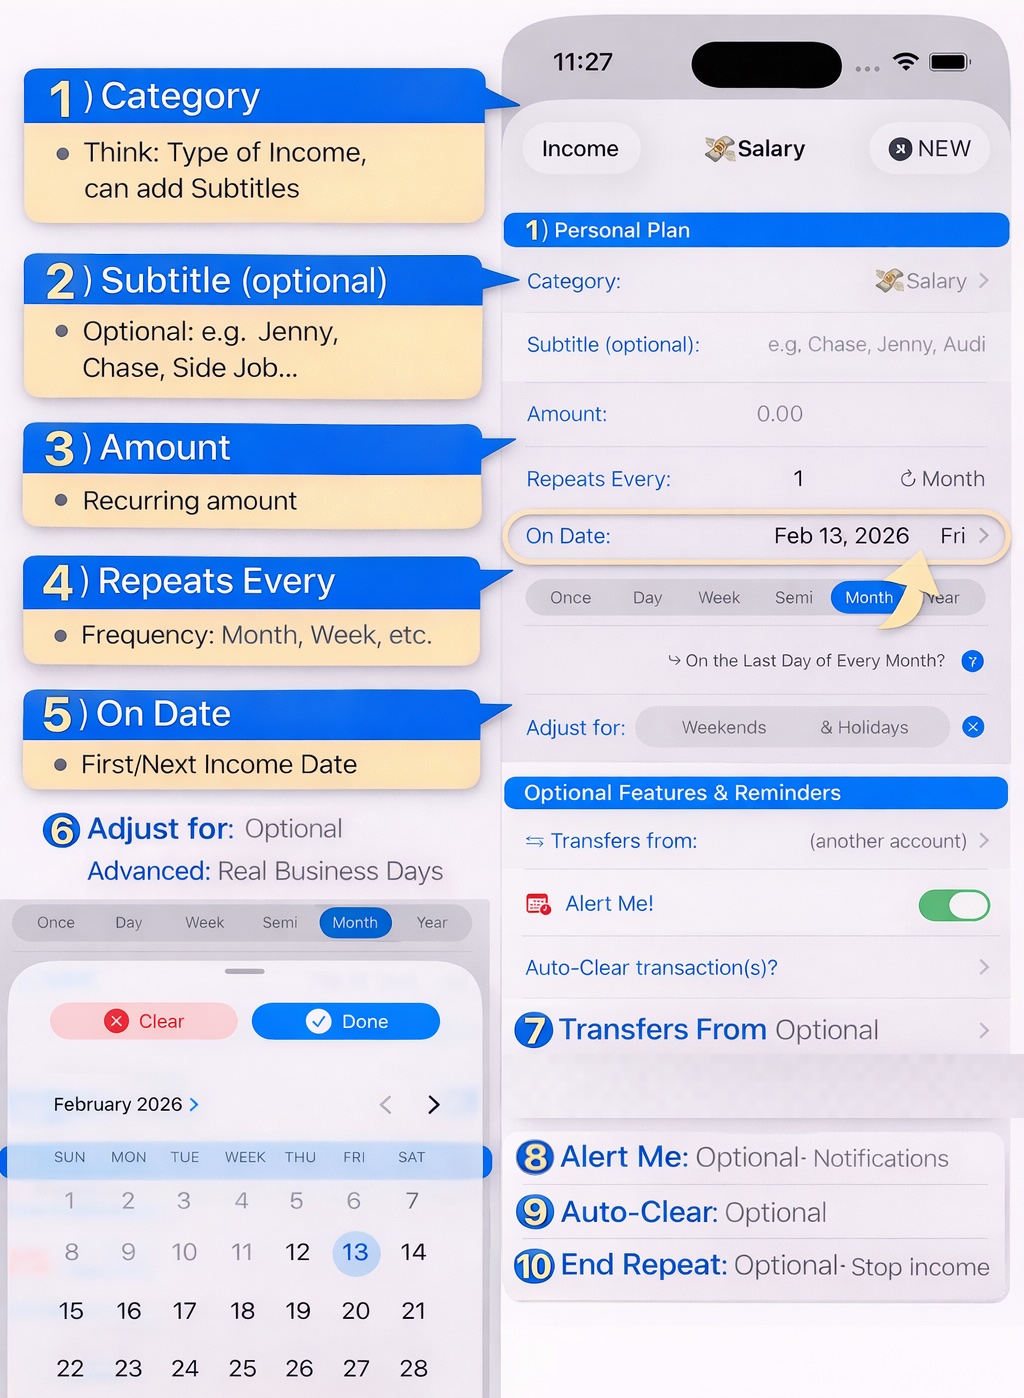
Each Plan form has these entries:
If you have multiple salary sources, you can:
• Either create separate salary categories
🔹 Subtitle: The Subtitle helps distinguish them (e.g., “Company A”, “Side Job”, etc.).
🔹 Amount: The recurring amount you receive or its estimate.🔹 Repeats Every: How often you receive it (monthly, weekly, etc.).🔹 On Date: This is the first (next) date you will receive this income. When you tap directly on the date, the calendar appears (as shown in the screenshot). Select the correct date, then tap Done.If you receive income on the last day of each month, you can enable: “On the Last Day of Every Month?” - The app will auto-calculate those dates.
🔹 Adjust For: This is an advanced feature.
It automatically shifts dates to real business days if income lands on weekends or holidays. It moves dates back for income and forward to adjust for any non-bank days.Optional Features Explained:
Final notes:
- If any scheduled income is not coming in, simply edit that single forecasted transaction you see under the chart and change the amount to 0. The forecast will instantly adjust.
- This general structure works the same way for Expenses.
✅ You can setup as many Income & Expense plans as you like and create as many Accounts or Categories as you like!
Need more help? Search this product's help articles, share a product idea, or send a ticket if you still need help.
Was this article helpful?
Your vote helps QApps find articles that need clearer steps or better screenshots.
What was missing?